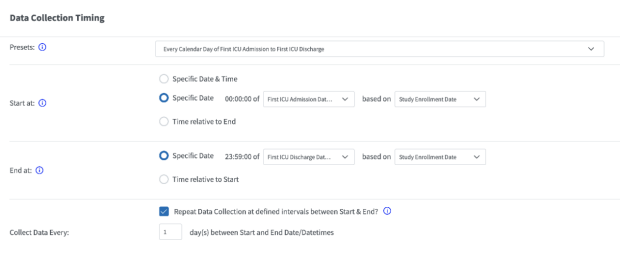
Every Calendar Day of First ICU Admission to First ICU Discharge
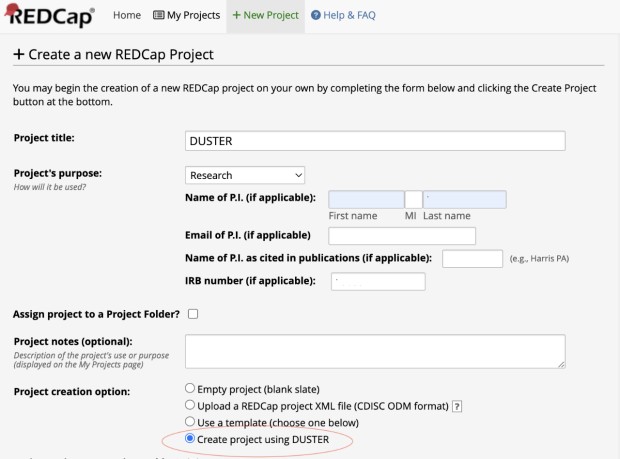
In order to use DUSTER for your clinical research project, you start by creating a new REDCap project (tutorials here). Your project must have a valid IRB with an associated STARR Data Privacy Attestation (DPA) to use DUSTER. If you're not sure what that means, the STARR Tools site has a comprehensive explanation.
Select “Research” as the project’s purpose, and supply your IRB number. Now select "Create project using DUSTER" and click "Create Project".
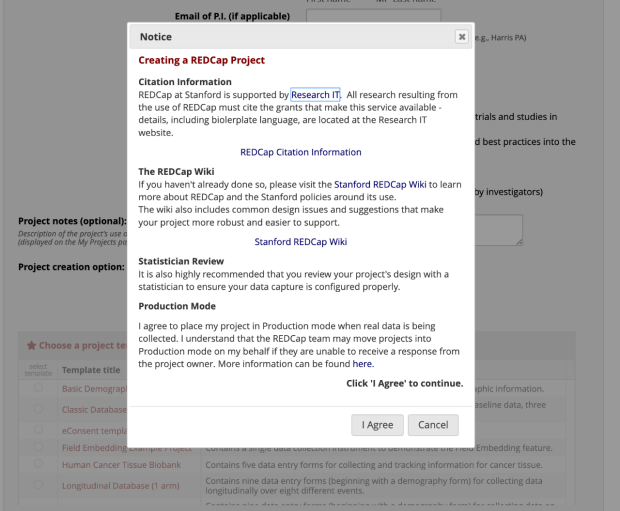
When you click "Create Project", a notice will pop up that you must agree to in order to continue. This notice will pop up when creating any REDCap project, even if you're not using DUSTER. You must click 'I agree' to continue and move on to the 'Create REDCap Project Survey'.
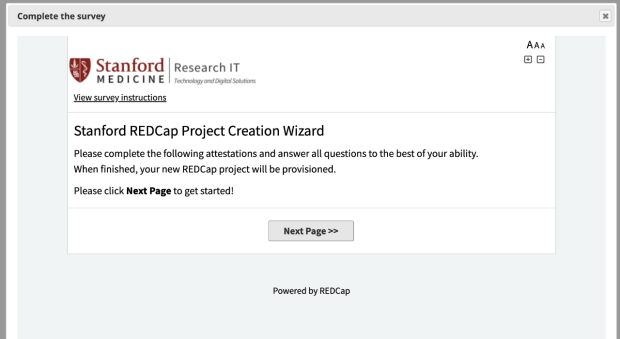
A survey will show up next. This survey is required when creating any REDCap project, even if you're not using DUSTER. Note that your answers in this survey will not affect your dataset design in DUSTER. After completing the survey, you will be redirected to DUSTER's user interface (UI) to design your dataset (as shown below).

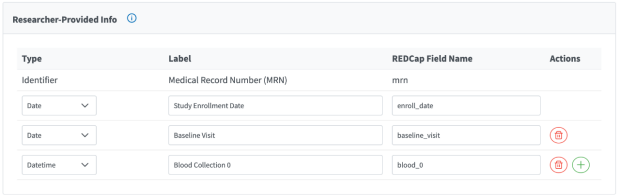
DUSTER requires that you provide Researcher-Provided Information, the information you already have about your cohort that DUSTER can use to retrieve the relevant clinical data you want. In the context of REDCap and DUSTER, each REDCap record represents a single member of your cohort. When DUSTER creates your REDCap project, it will create a dedicated instrument in the project which will contain the REDCap fields.
Currently, the only possible identifier to use for your cohort is the Medical Record Number (MRN).
Many studies have their own defined dates and datetimes that is not available in the EHR. Examples include study enrollment dates, study visits, sample collection datetimes, etc. By defining these dates and datetimes in your project, you may use them to define clinical data you'd like DUSTER to retrieve. To elaborate, clinical data is almost always partially defined by time. A notable exception to this is demographics. If you'd like to define a data collection window's timing using a clinical date/datetime, then identifying the relevant clinical date/datetime requires a researcher-provided date/datetime.
DUSTER can support up to 5 total Researcher-Provided Dates/Datetimes for each project. Every project has a predefined Researcher-Provided Date, "Study Enrollment Date". This date may be edited if desired. To add another date/datetime, press the green "plus" button under "Actions". A new row will appear in which you will need to enter its type, label, and REDCap field name. To delete a date/datetime, click on the appropriate "trash" button.

In this section, you may select whichever demographic variables you'd like DUSTER to retrieve. The demographics will be retrieved based solely on the MRN for each record in your cohort.

Data Collection Windows are a timing framework to define the clinical data you want DUSTER to retrieve. They are similar to case report forms for clinical trials. When you select the button "Add New Data Collection Window" a new row will appear that represents an empty Data Collection Window. You may then define the Data Collection Window with its timing, label, and clinical data. When you view your REDCap project, each Data Collection Window is represented as a data collection instrument. To delete a Data Collection Window, click on its corresponding "trash" button.
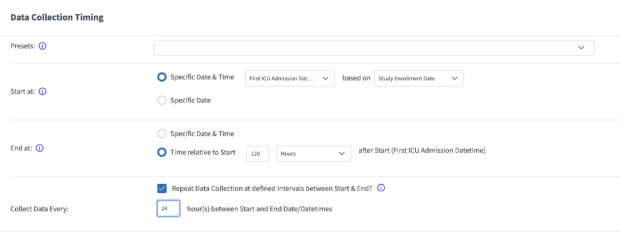
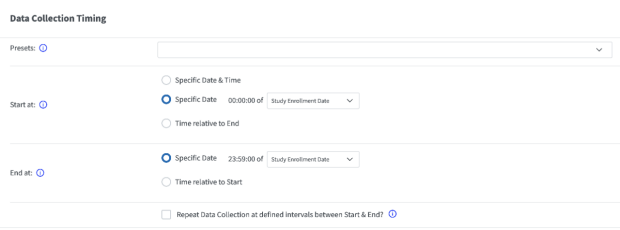
Click on the pencil icon under 'Timing' in a Data Collection Window's row. Doing so will open a pop-up form to define the timing of the Data Collection Window. At the top of the form, there is an option to select a preset configuration. Doing so will populate the rest of the form according to the preset you choose.
Note that when using clinical dates/datetimes as part of your definition for timing, the clinical date/datetime will have to be based on a Researcher-Provided Date/Datetime that you defined.
There are many possible configurations to define the timing of Data Collection Windows. Here are some examples.
The label for a Data Collection Window is simply the name of the Data Collection Window. It must be unique from other Data Collection Window's labels.
DUSTER currently categorizes clinical data into four separate categories- labs, vitals (flowsheets), outcomes, and scores. Each Data Collection Window's row displays a column for its clinical data. Contained in this column are four buttons that represents the categories and how many variables have been selected for each category. Clicking any of the buttons will open the same pop-up form where you may define the clinical data you'd like DUSTER to retrieve for the Data Collection Window.
Labs and Vitals
When selecting a lab or vital, these categories require each variable to be defined with aggregations. DUSTER does not currently provide the option to retrieve every instance of a lab or vital. Each Data Collection Window's pop-up form for clinical data has a section to select default aggregations. When a lab or vital is selected, it will be initially defined with the selected default aggregations. Individual labs or vitals can have their own custom set of aggregations by selecting their gear icon under the "Aggregates" column. At least one default aggregation must be selected if any lab or vital is being defined with default aggregations.
Aggregations
Currently, the possible aggregations in a Data Collection Window includes the following:
Outcomes
Unlike labs and vitals, any clinical phenotype that falls under this category can only have one possible instance in any Data Collection Window. This includes boolean-type outputs or similar. An example is when selecting the outcome "O2 Delivery Modes" in a Data Collection Window. This clinical variable outputs as a REDCap field of checkboxes that includes each mode of oxygen delivery (RA, NC, HFNC, etc.). If a patient received a particular mode of oxygen in that Data Collection Window, then the checkbox for that mode of oxygen will be checked off.
Scores
This category includes severity-of-disease classification systems such as the APACHE II Score and SOFA Score. By selecting a score in a Data Collection Window, all the individual components for a score will be included. Like any other clinical data that is added to a Data Collection Window, the score will be contextualized to the Data Collection Window's timing.
The majority of individual components for a score will be automated by DUSTER. However, some variables will have REDCap fields created, but will require manual entry by the researcher. An example of this is "number of comorbidities" in the 4C Mortality Score for COVID-19. DUSTER does not currently have an algorithm to output this clinical variable, so researchers will have to manually phenotype it themselves.
When you are finished designing your dataset, you can proceed to review your design and create your REDCap project. Upon pressing the "Review & Create Project" button, you will be taken to a review page that outlines the REDCap instruments and fields that will be created. Toward the bottom of the page, you have the option to go back and edit your design again. Otherwise, you may proceed to create your project by selecting the "Create Project" button. After DUSTER creates your project, you will be redirected to it.
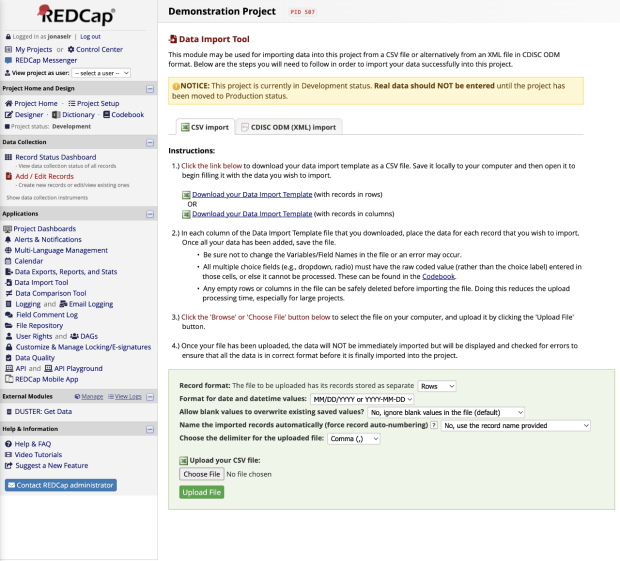
Prior to getting data from DUSTER, you should first perform a bulk import of your cohort's Researcher-Provided Information into your newly-created REDCap project. On the lefthand panel of your REDCap project under the 'Applications' section, there is a link for the 'Data Import Tool'. Click on the link to navigate to its page.
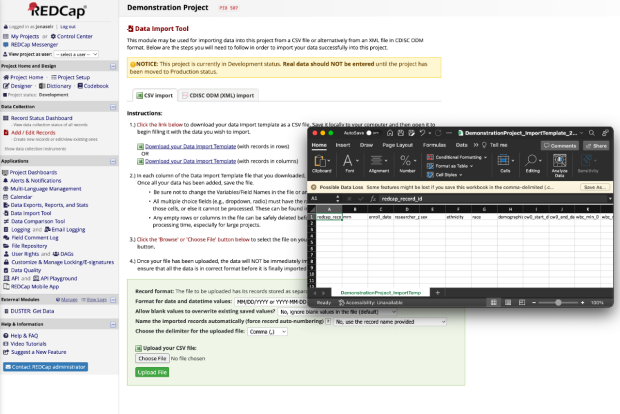
On the Data Import Tool's page, click on the link 'Download your Data Import Template' (with records in rows). Save this file and open it with Microsoft Excel.
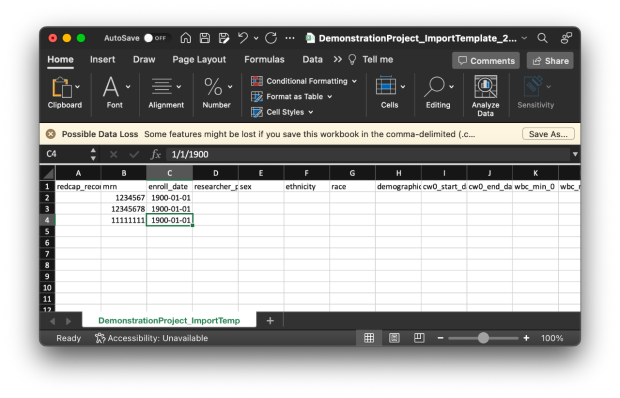
In your project's Data Import Template, copy and paste your cohort's Researcher-Provided Information into the appropriate columns. For medical record numbers, this should be the 'mrn' column. For Researcher-Provided Dates/Datetimes, their columns are labeled by their REDCap field name. Remember that each row in this template represents a single record.

Medical record numbers must be saved in REDCap in an 8-digit format with leading zeroes. Here are step-by-step instructions to ensure the MRNs you added to your template match the required format:

The first column of your project's template should be 'redcap_record_id'. For each row of your cohort assign them a number, starting with 1.
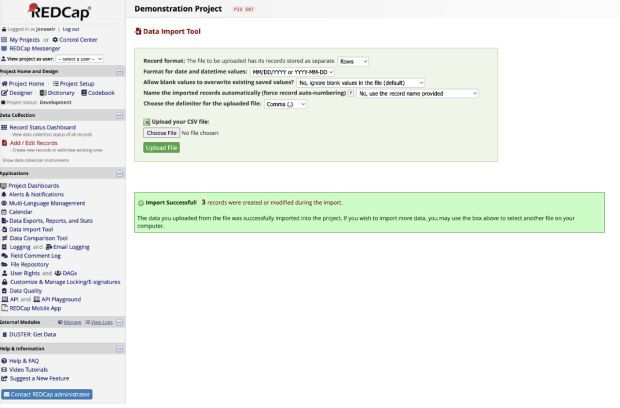
After making changes from the previous steps above, save your project's template as a .csv file. Back in your REDCap project's Data Import Tool page, there is a green box on the bottom where you may upload the template you just saved. Click 'Choose File' and select your saved template file. Next, click 'Upload File'. The Data Import Tool should then display a review page for you to confirm your import changes.
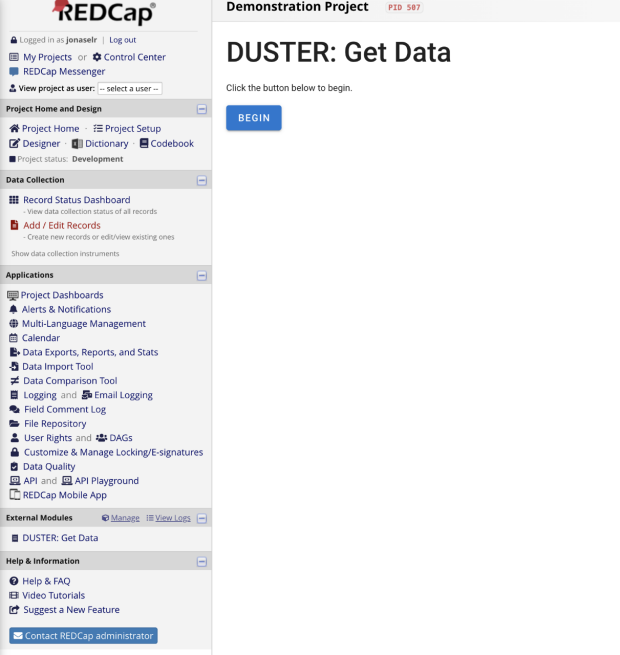
On the lefthand panel of your REDCap project, there is a link 'DUSTER: Get Data' under the section 'External Modules'. Clicking that link will navigate you to the page where you can request DUSTER to retrieve and save clinical data to your REDCap project. Click the 'Begin' button on this page to get started.
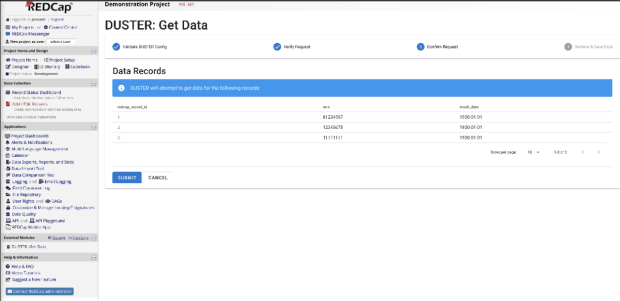
DUSTER will validate your project's configuration and verify your request. After DUSTER confirms that you can make a request, you will be able to hit a 'Submit' button to do so.
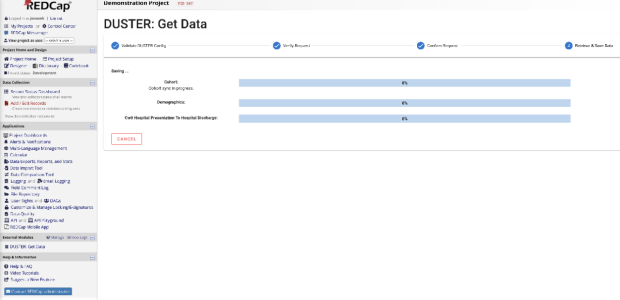
As DUSTER retrieves and saves data to your REDCap project, its progress will be displayed on this page. Data is saved in real-time. You are required to stay on this page for DUSTER to continue running queries and saving data.